
Data loss on Windows 11 can be a frustrating experience, especially if the deleted data is crucial to your work or personal life. There are several reasons, like accidental deletion, system crashes, malware or virus attacks, etc. why data usually gets deleted on Windows devices. Luckily, Windows 11 provide various methods and tools to help you recover lost or deleted data on Windows 11.
This guide will walk you through several effective methods to retrieve your valuable files, whether accidentally or intentionally deleted.
Common Reasons for Deletion of Data on Windows 11
Data deletion on Windows 11 devices can occur due to many reasons, ranging from user actions to software or hardware-related issues. Here are some main causes:
- Accidental Deletion: You may have unintentionally deleted important files by pressing the wrong keys or using the Shift + Del key, which permanently deletes your files, bypassing the Recycle Bin.
- Formatting: Formatting a drive or partition erases all data on it. Users may do this by mistake or when attempting to resolve other issues.
- System Crashes: Operating system crashes, blue screens, or unexpected shutdowns can also lead to corruption or even deletion of data on Windows devices.
- Hard Drive Failures: Mechanical or electronic failures in hard drives or other storage drives can make data inaccessible or lead to loss of data stored on the device.
- Power Surges: Sudden power surges or outages while saving or transferring files between devices can damage storage devices, leading to data corruption or loss.
- Malware and Viruses: Malicious software like viruses or malware can delete, corrupt, or encrypt files, causing data loss issues.
How do I Recover Lost or Deleted Data on Windows?
Here are some commonly used recovery workarounds, including manual methods and third-party free data recovery software that you can use to restore lost data. Just go with the below methods one by one to know how to recover lost or deleted data on Windows 11 PCs:
Method 01: Check the Recycle Bin
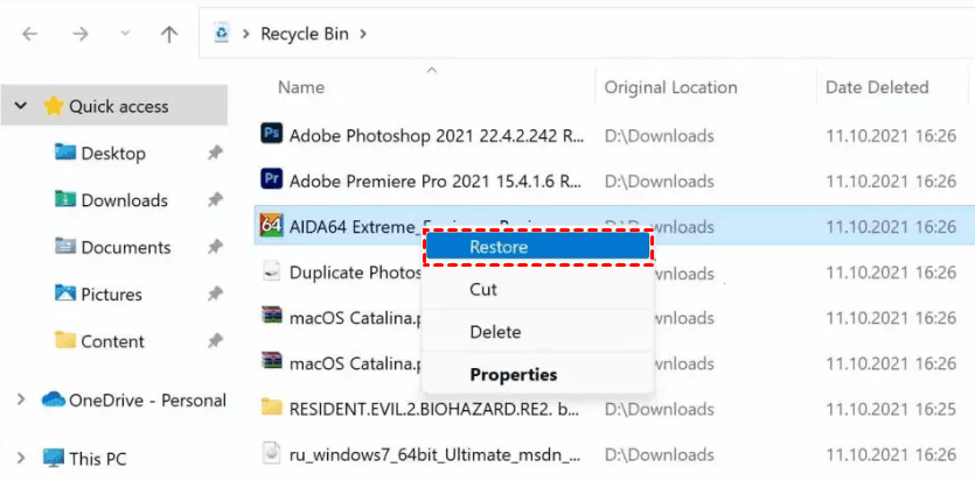
Before you apply any manual workaround or use free data recovery software to recover your lost data on Windows 11, it is important to check the Recycle Bin folder. Every deleted file on Windows PC goes to the Recycle Bin folder and remains there for 30 days in which you can easily restore them. To recover your lost data from the Recycle Bin folder, you need to:
- Double-click on the Recycle Bin folder on your Windows device to open it.
- Find and select the recently deleted files that you need to restore.
- Right-click on any selected file and choose the Restore option to save the files back to their original location.
Method 02: Recover Lost Data Using File History Backups
If your lost or deleted data is not present in the Recycle Bin folder, then it might have been permanently removed from your device. In such cases, you can check the previously created backups on your Windows 11 device to ensure that your deleted file is present there.
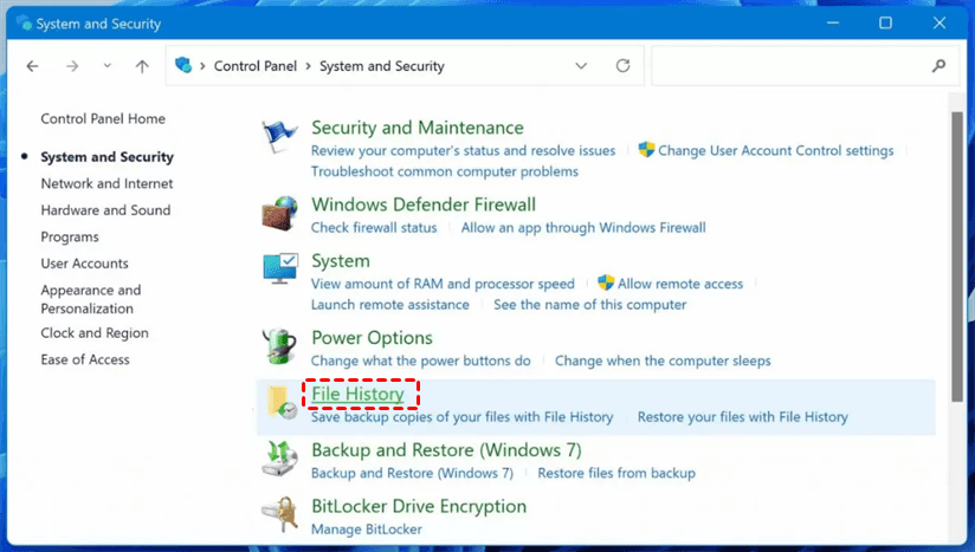
File History is Windows built-in backup feature in Windows 11 that automatically saves copies of your files at regular intervals. Follow the below steps to restore previous versions of deleted files using File History backups:
- Go to Control Panel > System and Security > File History.
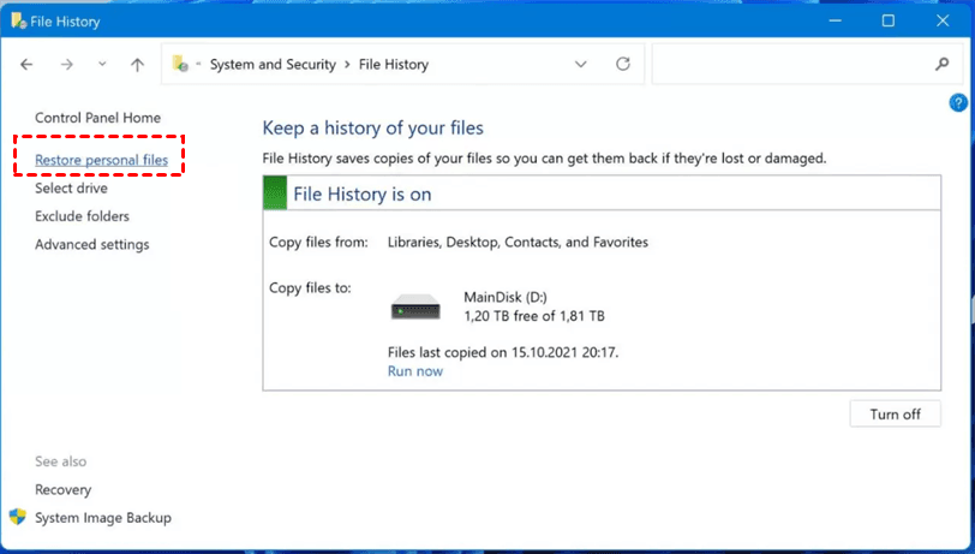
- Now, click the Restore Personal Files option from the left navigation pane.
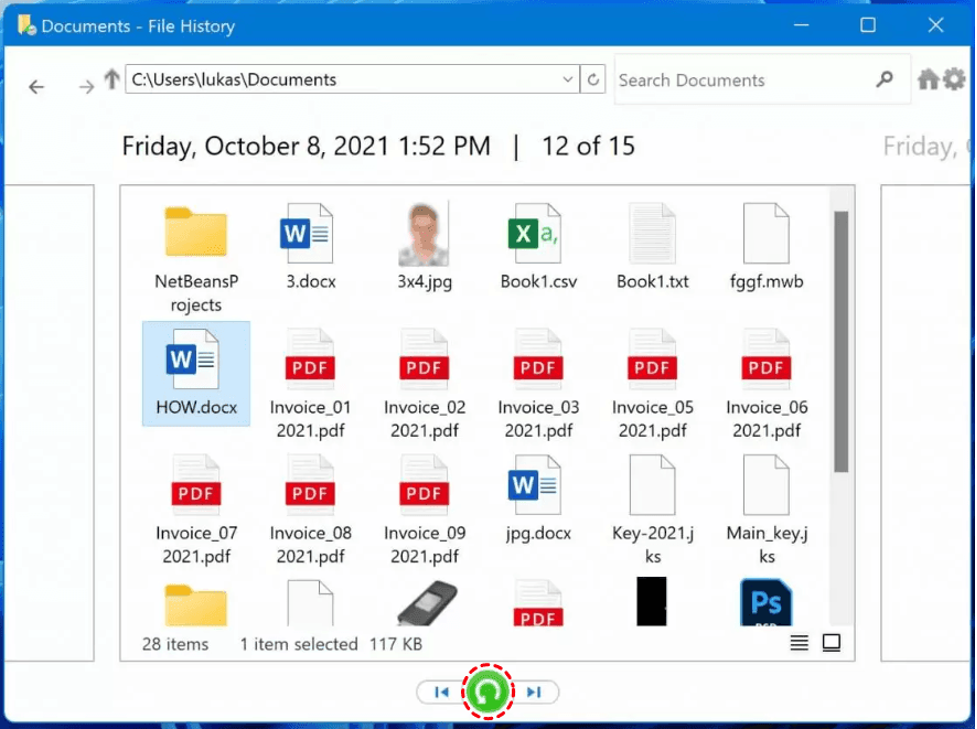
- Browse through different versions until you find the required version of deleted files. Select it and click the green Restore button to save the selected file back to your device.
Method 03: Use OneDrive Backups to Restore Lost files on Windows 11
If you use OneDrive to sync your files, you might be able to recover deleted files from the cloud storage. For this:
- Go to the OneDrive website and log in with your Microsoft account.
- Locate the deleted data you need to restore. Then, click the Download button.
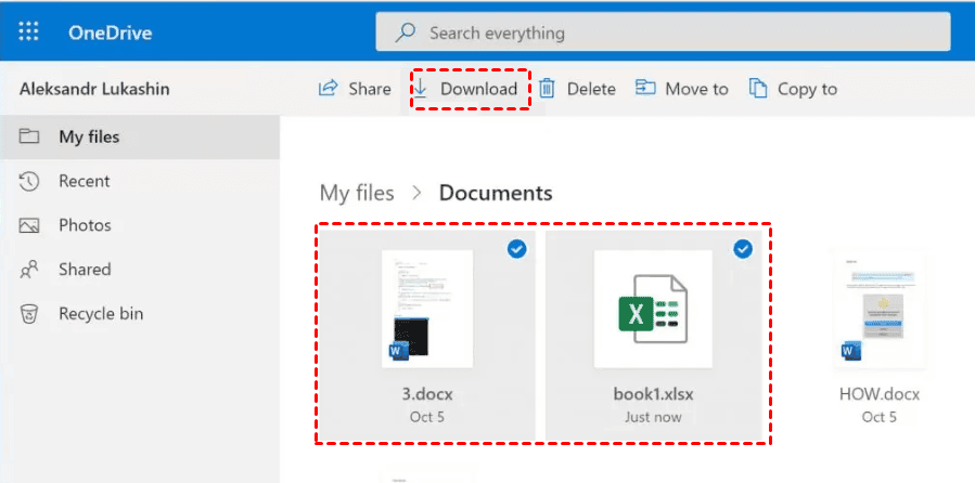
- Also, select a location where you want to restore deleted files and click Restore.
Method 04: Restore Lost or Deleted Data to Previous Versions
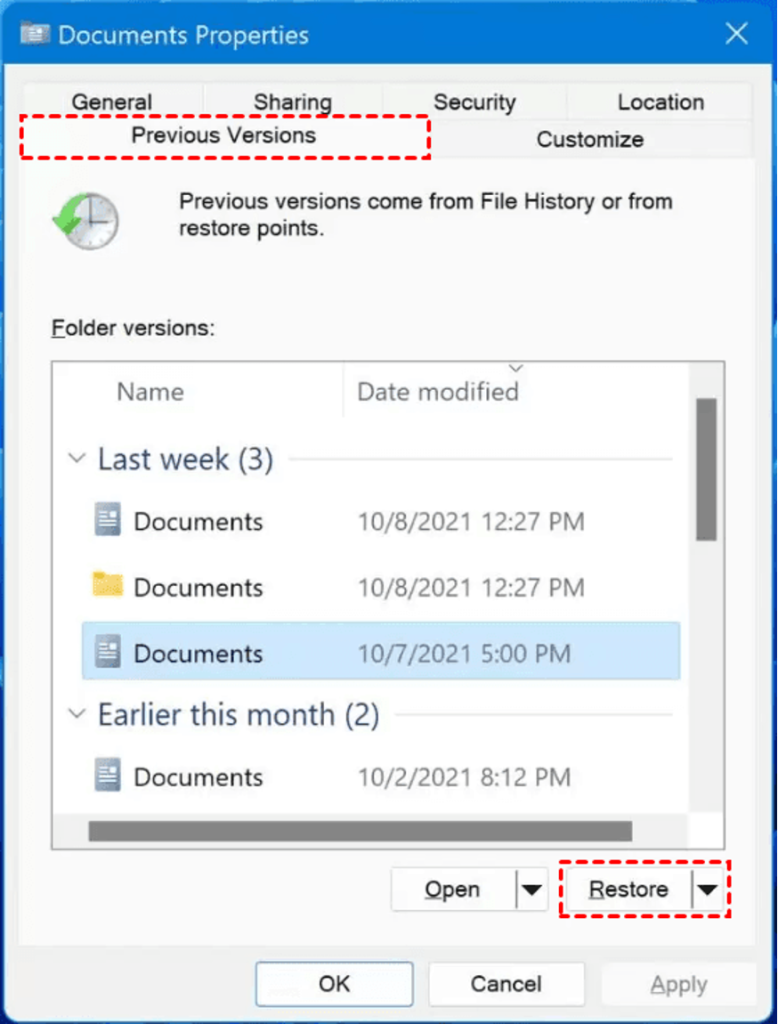
Another backup alternative that you can use to recover lost or deleted data on Windows 11 devices is via the Previous Version backup utility. If you have enabled this backup option on your Windows PC, follow the below steps to restore deleted data quickly:
- Select and right-click on the folder containing your deleted data and then select Properties.
- Switch to the Previous Versions tab and check if there is a previous version. Or click the Open button to confirm it.
- Lastly, select the previous folder version that you need to recover and click Restore. If there are any new data, you need to backup them first or move them out.
Method 05: Use a Free Data Recovery Software
If the above-mentioned data recovery methods get failed to recover lost or deleted data on Windows 11 PC, it’s time to use a free data recovery software. There are several free data recovery software available online, but we recommend using the Stellar Data Recovery Free tool, which is known for its amazing features. The Stellar data recovery software allows you to recover your data deleted due to any reason, including accidental deletion, formatting, system crashes, etc. in no time.
- The Stellar Data Recovery Free software allows you to recover up to 1 GB of data of any type, including photos, videos, documents, and many more.
- The software supports recovery of data deleted or lost from any internal or external storage device, such as SD cards, hard drives, USBs, etc.
- Retrieves data deleted from formatted, encrypted, or corrupted drives.
- The free data recovery software is available in multiple paid versions as well which vary in prices and features.
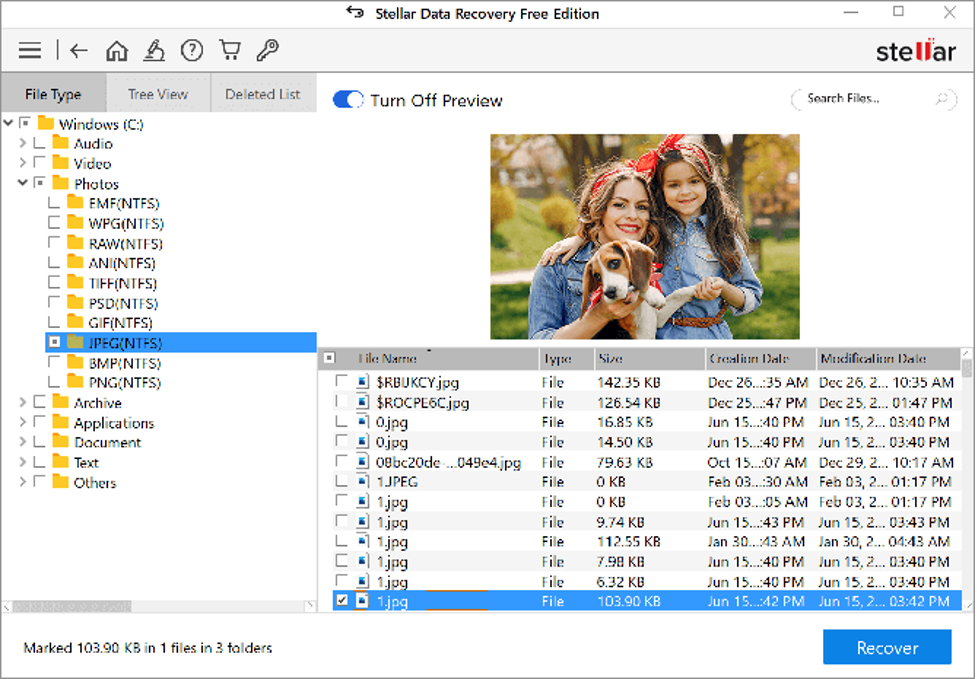
- Stellar’s free data recovery software displays an augmented preview of the recoverable files after scanning the storage drive.
Here’s how to recover lost or deleted data on Windows 11 devices using the Stellar Data Recovery Free tool:
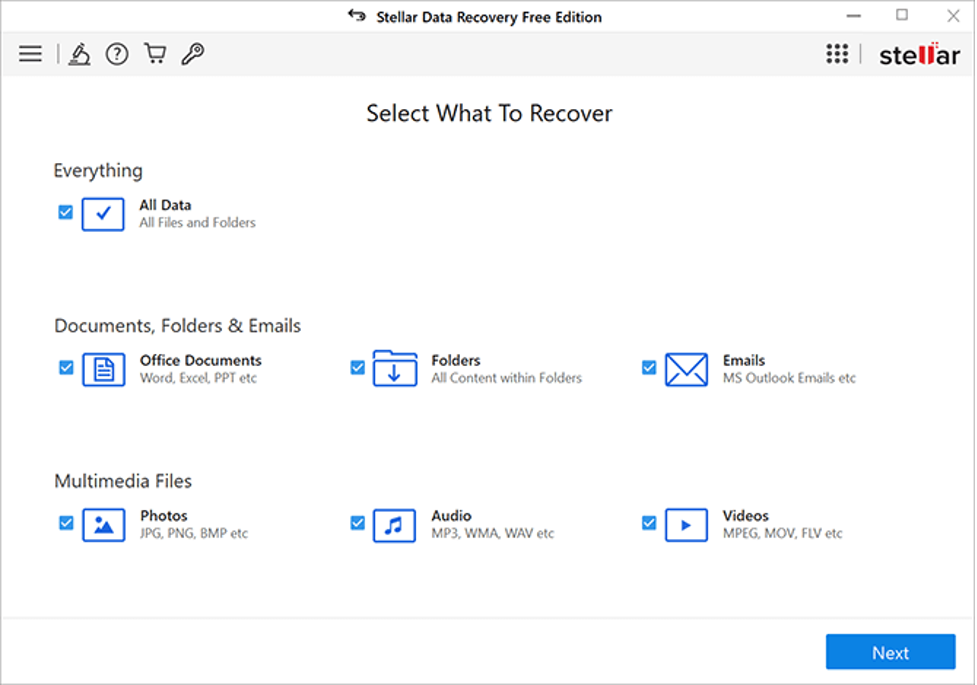
Step 1: Launch the Free data recovery software – Stellar Data Recovery Free on your Windows device. From the homepage, select the type of data you need to restore and click the Next button.
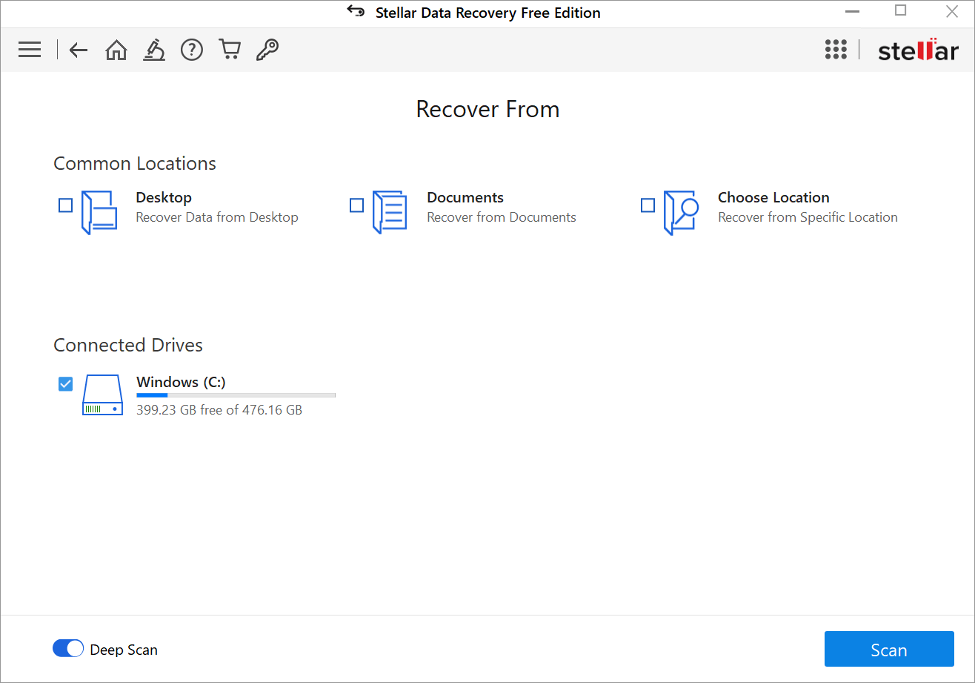
Step 2: Now, from the Recover From window, choose the storage drive where your deleted data was earlier stored and click Scan to initiate the scanning process.
Step 3: After scan completion, preview the recoverable data and select the file/folder that you need to restore. Click the Recover button to save selected data at the desired location.
Wrapping Up:
If you ever experienced sudden loss or deletion of important data on Windows 11 devices, don’t lost hope as with the right tools and methods, you can often recover your lost files. Start by checking simple solutions like the Recycle Bin and File History, then move on to more advanced methods like free data recovery software if required. Moreover, maintaining regular backups of your files and considering some preventive measures like providing continuous power supply or using strong passwords can help protect your data from future loss.


